How to measure prints and posters like an expert
Accurately measuring prints and posters can be challenging. This guide will give you the tools to accurately measure them. Before handling your prints and posters, make sure your hands are clean and dry, and use gloves if you have them.
The standard format for reporting measurements of a print or a poster is as follows: Height x Width. For a framed artwork, use this format: Height x Width x Depth.
Experts need three different measurements to assess your print or poster: Sheet, Image and Plate. If the work is in a frame, they also need to know the Sight and Frame measurements.
Sheet: Measure the entire sheet of paper. If your item is in a frame, you may not be able to take this measurement. See the red line in the illustration below.
Image: Measure the colored area. See the yellow line in the illustration below.
Plate: Plate marks are faint indentations surrounding the image, and are usually square or rectangular in shape. See the blue line in the illustration below.
Sight: This is the area of the artwork that is visible inside the mat or frame. See the orange line in the illustration below.
Frame: This is the overall size of the frame. See the purple line in the illustration below.


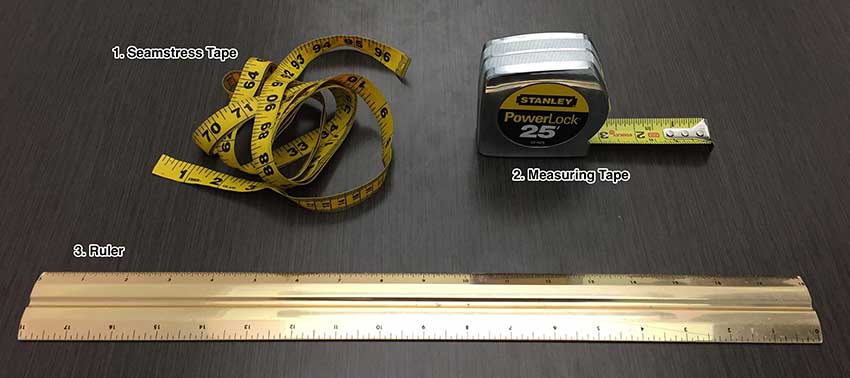
BASIC TYPES OF MEASURING TOOLS:

- Seamstress tape: Soft and flexible, good for measuring circumference, three-dimensional objects or curved objects.
- Measuring tape: Rigid, can be hooked onto a frame or canvas, good for measuring straight items that are longer than one foot.
- Ruler: Rigid, good for measuring straight items smaller than one foot, particularly small items that can be laid directly on the ruler.
How to Measure:
- Place the “Zero” end of your ruler at one end of your print (the “Zero” end is usually on the left side of the ruler).
- Make sure the end of your ruler is flush (in line) with your print.
- Adjust your ruler so that it is aligned with your print.
- Move to the opposite side of the print you are measuring and read the ruler.

